Security Inspection Checkpoint Checklist: A Practical SOP
2026-09-21 · 7 min read
A security inspection checkpoint only works when it is run the same way every shift. That consistency comes from a written procedure — a screening SOP that covers what you screen for, how the checkpoint is laid out, who operates each piece of equipment, and what happens when something is found. This practical checklist walks through a security inspection procedure for entrance screening checkpoints at schools, buildings, and factories, with a quick-reference table you can hand to a supervisor.
Key takeaways
- Define what you screen for and who is covered, in writing, before day one.
- Layout keeps the line moving — separate entrance, screening, secondary-check, and exit lanes.
- Assign each piece of equipment to one operator, and cross-train for shift rotation.
- A written, repeatable procedure is what turns equipment into a checkpoint.
- Log exceptions, review them on a schedule, and run periodic drills to catch soft failures.
Define what you are screening for and who is covered
Every checkpoint starts with a clear scope. Decide what you are actually screening for — weapons, prohibited tools, contraband, theft on exit — and write it down in plain language the guard team can apply consistently. A checkpoint without a defined purpose drifts into either under-screening or harassing everyone equally, and neither is acceptable.
Define who is covered: all staff, contractors, visitors, and delivery drivers, or only some of those groups. The fairest and most defensible programs screen everyone who passes through, regardless of role, so the policy does not look selective. Confirm any applicable DepEd issuances, local ordinances, or building administration rules that shape your scope, and verify current requirements rather than relying on a fixed assumption.
Checkpoint layout and flow
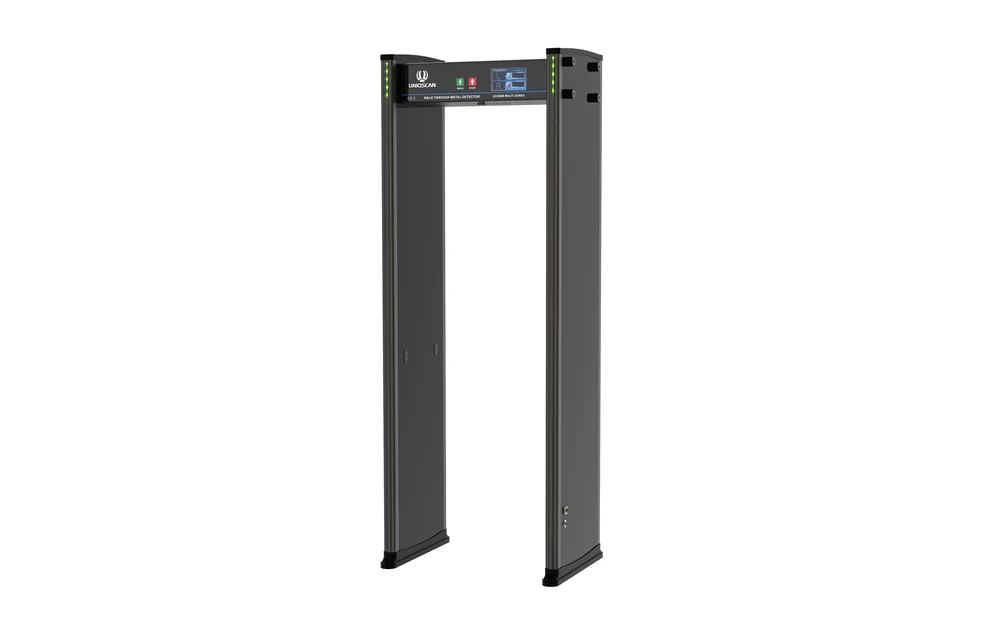
A checkpoint is a small process, and layout is what keeps it moving. Plan for a clear entrance lane, the walk-through metal detector at the front, a bag-check table or X-ray baggage scanner beside it, and a marked secondary-check spot a few steps away where alarms are resolved without blocking the main lane.
Keep the exit lane separate from the entrance so people who have been cleared do not walk back through the screening zone. Signage that shows people what to do — remove large metal, place bags on the table, walk through the arch — reduces the questions guards have to answer repeatedly and keeps the line steady.
Equipment and who operates it
Assign each piece of equipment to a specific operator. One guard watches the arch and calls out alarms; a second carries a handheld metal detector for secondary checks; a third runs the bag scanner or table. When everyone has one job, no step is missed and the line keeps moving.
Cross-train so guards can rotate roles across shifts without the checkpoint losing consistency. Whoever operates the X-ray scanner should have supervised practice on real bags before screening alone, and whoever runs the wand should follow the same sweep sequence every time. Equipment without trained operators is just expensive furniture.
Standard procedure step by step
A written, repeatable procedure is what turns equipment into a checkpoint. Train guards to follow the same sequence for every person.
- Greet the person and tell them what will happen — remove large metal, place bags on the table or conveyor.
- Run the bag through the X-ray scanner or hand it to the bag-check guard.
- Have the person walk through the arch at a normal pace.
- If the arch does not alarm and the bag is clear, clear the person through.
- If the arch alarms, move the person to the secondary-check spot and sweep with the wand to pinpoint the source.
- Resolve the alarm — identify the item, confirm it is allowed or not — before clearing or escalating.
- Log any exception: time, what was flagged, action taken, and who handled it.
Escalation, incident logging and documentation
Define the escalation path before the first day of screening. A guard who finds a prohibited item should know immediately who to call, where to hold the item, and how to involve the visitor’s host or the employee’s supervisor. Ambiguity at the moment of discovery is how incidents get mishandled.
Keep a simple incident and exception log — time, what was flagged, action taken, handler — and review it on a set schedule. Patterns surface over weeks: a recurring item, a slow lane, a guard who needs refresher training. That review is what turns a daily checkpoint into a program that improves, whether it serves schools, corporate facilities, or property management sites.
Maintenance, calibration and periodic drills
Equipment drifts. An arch that was calibrated correctly at installation can shift as doors, rebar, and nearby metal change around it, and a wand with a fading battery misses items a charged one would catch. Build a periodic maintenance and calibration check into the schedule, using a test piece for the arch and a known object for the wand, and log the results.
Run a drill periodically — a surprise test object through the checkpoint — to confirm the whole process, not just the equipment, still works. Drills catch the soft failures a routine shift hides: a guard who has stopped resolving alarms, a scanner image nobody is really reading, or a layout change that created a blind spot. Follow the manufacturer’s guidance and any applicable local requirements for calibration intervals, and confirm current expectations with your administration.
Quick-reference checklist
Use this quick-reference checklist as a one-page summary for the checkpoint supervisor. It distills the sections above into the items that need to be confirmed every operating day.
| Item | Confirm |
|---|---|
| Scope | What you screen for, and who is covered |
| Layout | Lanes, arch, scanner, bag table, secondary-check spot |
| Equipment | Arch, wand, X-ray scanner — and who operates each |
| Procedure | Greet, screen, resolve alarms, clear or escalate |
| Escalation | Who is called, and what happens to a prohibited item |
| Logging | Exceptions recorded and reviewed on a set schedule |
| Maintenance | Calibration checks, test pieces, and periodic drills |
Frequently asked questions
Who should be screened at a checkpoint?
The fairest and most defensible programs screen everyone who passes through — staff, contractors, visitors, and delivery drivers — so the policy does not look selective. Define who is covered in writing, and confirm any applicable DepEd issuances, local ordinances, or building administration rules that shape your scope, verifying current requirements rather than relying on a fixed assumption.
What should we log at the checkpoint?
Log the exceptions, not every clean pass: the time, what was flagged, the action taken, and who handled it. Reviewing that log on a set schedule surfaces patterns — a recurring item, a slow lane, or a guard who needs refresher training — that would otherwise be hidden in the daily routine.
How often should we calibrate and drill the checkpoint?
Build a periodic calibration check into the schedule using a test piece for the arch and a known object for the wand, and log the results. Run a surprise drill periodically to confirm the whole process still works, not just the equipment. Follow the manufacturer’s guidance and any applicable local requirements for calibration intervals, and confirm current expectations with your administration.
Getting started
If you are writing a checkpoint SOP or want a second set of eyes on an existing one, our team can help you lay out the procedure and match equipment to each role.